Frequently Asked Question
How do I archive email messages in Outlook?
Last Updated 11 years ago
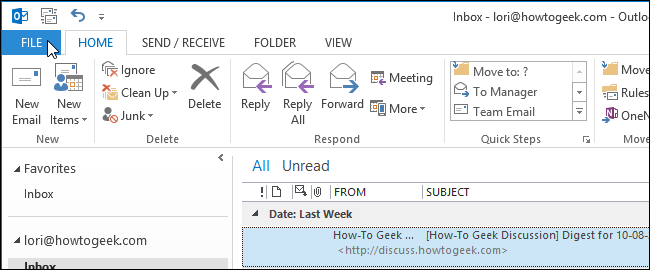
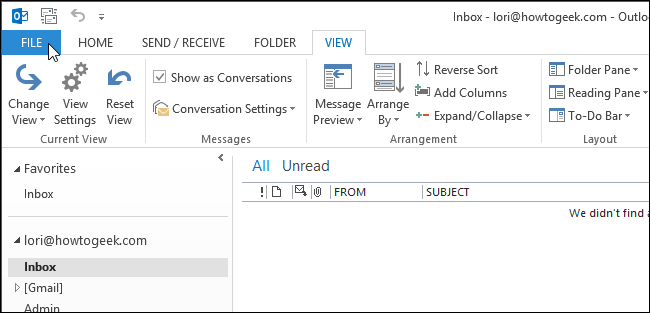
1. To begin archiving your email, click the “File” tab on the ribbon.
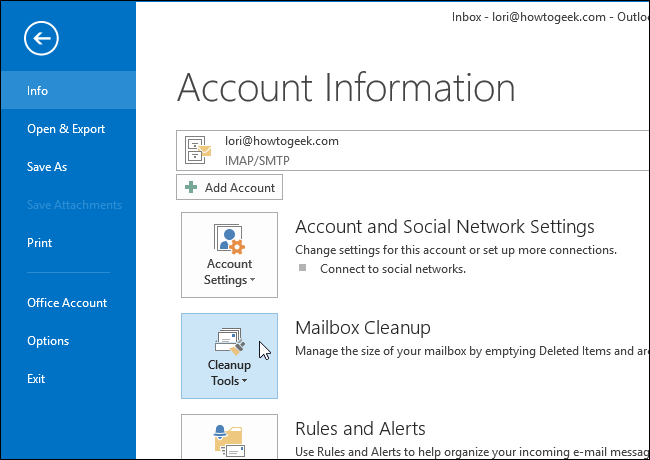
2. On the Account Information screen, click the “Cleanup Tool” button next to “Mailbox Cleanup.”
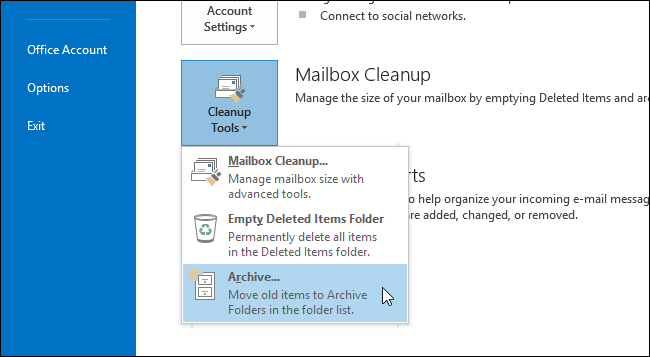
3. Select “Archive…” from the drop-down menu.
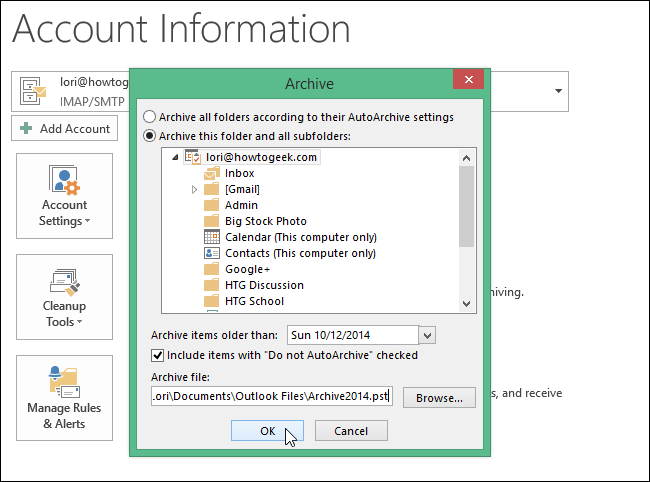
4. The Archive dialog box displays. Select “Archive this folder and all subfolders” and select a folder to archive. If you want to archive all your email, select the node with your email address at the top.
Click the “Archive items older than” drop-down list to select the latest date for items to be archived. A calendar pops up. Select a date in the current month by clicking on the date or scroll to a different month to select a date. All items older than the selected date will be archived.
If you want to archive items that are not set to archive automatically using AutoArchive, select the “Include items with “AutoArchive” checked” check box.
Click the “Browse” button if you want to change the location where the archive file will be saved and the name of the archive file. Click OK when you have made your selections.
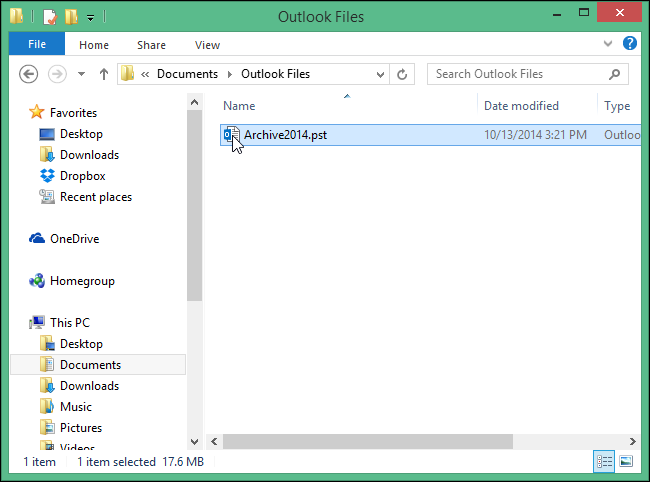
5. The archived .pst file is saved to the chosen location
6. Notice that all the email messages you chose to archive are not available anymore in the main .pst file. The archived .pst file should become available automatically in Outlook. However, if it doesn’t, click the “File” tab.
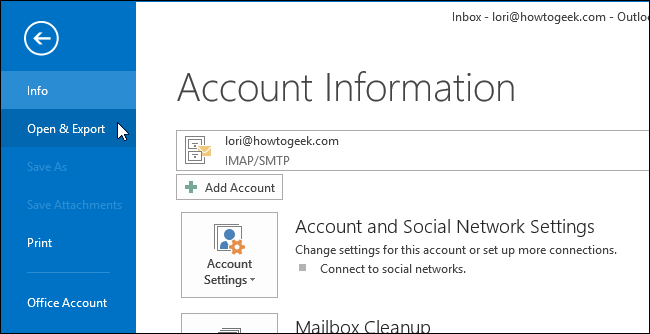
7. In the blue panel on the left side of the “Account Information” screen, click on “Open & Export.”
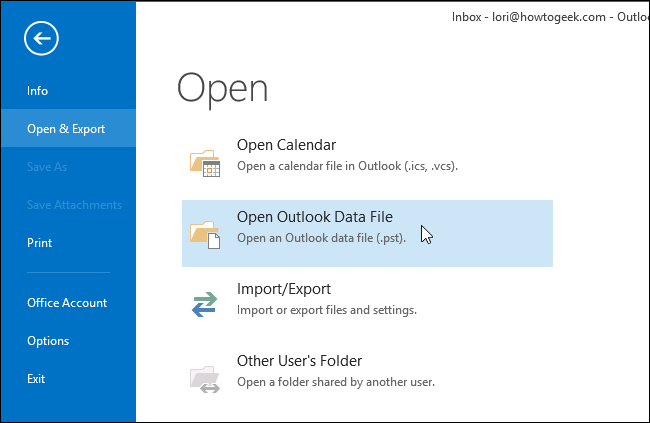
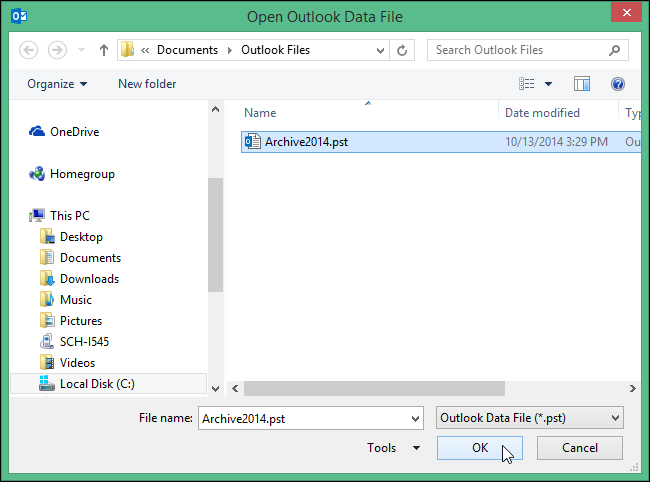
8. On the “Open” screen, click “Open Outlook Data File.”
9. The “Open Outlook Data File” dialog box opens. Navigate to the location where you saved the archived .pst file, select it, and click OK.
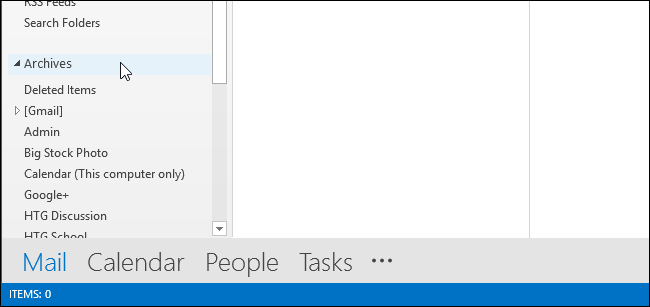
10. In the left pane of the main Outlook Mail window, a section called “Archives” displays and the emails you archived are available.
2. On the Account Information screen, click the “Cleanup Tool” button next to “Mailbox Cleanup.”
3. Select “Archive…” from the drop-down menu.
4. The Archive dialog box displays. Select “Archive this folder and all subfolders” and select a folder to archive. If you want to archive all your email, select the node with your email address at the top.
Click the “Archive items older than” drop-down list to select the latest date for items to be archived. A calendar pops up. Select a date in the current month by clicking on the date or scroll to a different month to select a date. All items older than the selected date will be archived.
If you want to archive items that are not set to archive automatically using AutoArchive, select the “Include items with “AutoArchive” checked” check box.
Click the “Browse” button if you want to change the location where the archive file will be saved and the name of the archive file. Click OK when you have made your selections.
5. The archived .pst file is saved to the chosen location
6. Notice that all the email messages you chose to archive are not available anymore in the main .pst file. The archived .pst file should become available automatically in Outlook. However, if it doesn’t, click the “File” tab.
7. In the blue panel on the left side of the “Account Information” screen, click on “Open & Export.”
8. On the “Open” screen, click “Open Outlook Data File.”
9. The “Open Outlook Data File” dialog box opens. Navigate to the location where you saved the archived .pst file, select it, and click OK.
10. In the left pane of the main Outlook Mail window, a section called “Archives” displays and the emails you archived are available.